Edge Custom
SIDE: Key Features Installation Quick Start Checklist Updating the Theme Troubleshooting / FAQ Credits and Support Theme Settings Navigation Layout Related Posts Navigation Social Accounts Optional Page
Edge Theme Documentation
Documentation
Edge is a clean, versatile Ghost theme built for bloggers, photographers, and editorial publications that want a strong landing-page first impression paired with a flexible masonry-style post layout. It combines five homepage header styles, full color control, related-post recommendations, and granular post-feed settings. This page covers everything you need to set it up and make it your own.
Key Features
- Five homepage header styles — Landing, Highlight, Magazine, Search, or Off — switchable with one click
- Three navigation layouts: Logo on the left, Logo in the middle, or Stacked
- Full color control — custom site background color, plus header/footer color set to either background color or accent color
- Hero signup section with editable heading, subheading, and email capture form, defaulting to your site title and description when left blank
- Background image toggle that pulls directly from your publication cover
- Masonry-style post image layout with mixed aspect ratios for a natural, editorial feel
- Two post feed styles — List or Grid — with toggles for images, author, publish date, and publication info sidebar
- Post-level controls for metadata display, drop caps, and related articles
- Related posts module with a customizable title (defaults to "You might also like…") and an on/off toggle
- Five-item primary navigation support (Home, About, Style Guide, Author, Collection) plus a separate Secondary navigation, managed via simple drag-and-drop
- Dismissible announcement bar with three background colors and visibility rules for public visitors vs. free members
- Built-in social icons (X, Facebook, and more), Sign up link, and clean footer — ready out of the box
Installation
- Download the theme
.zipfile. - In Ghost Admin, go to Settings → Design and branding → Change theme.
- Click Upload theme and select the
.zipfile. - Once it's validated, click Activate.
If the upload is rejected, the most common cause is the zip containing a wrapper folder instead of the theme files at the top level.
Quick Start Checklist
Use this checklist to get Edge looking right within the first 15 minutes after activation.
- Set your Site title and Site description under Settings → General → Title & description
- Upload your logo and publication cover under Design & branding → Brand
- Choose a Header style (Landing recommended) under Design & branding → Theme → Homepage
- Pick a Navigation layout — Logo on the left, Logo in the middle, or Stacked
- Set your Site background color and Header/footer color to match your branding
- Customize the Signup heading and Signup subheading, or leave blank to default to your site title/description
- Enable or disable the Background image toggle depending on whether you want the publication cover behind your hero section
- Choose a Post feed style — List or Grid — and toggle images, author, and publish date as needed
- Turn on Show related posts and set a custom Related posts title if desired
- Add your navigation links under Settings → Navigation (Primary and Secondary)
- Connect your social accounts under Settings → Social accounts
- Set up the Announcement bar if you want a promo or notice banner, and configure its visibility (public visitors / free members)
- Publish at least 3–5 posts so the homepage feed and related articles don't look empty
Updating the Theme
All of your settings (color scheme, navigation layout, header style, announcement bar) are stored in Ghost's database — not in the theme files. This means you can safely upload a new version of the theme .zip at any time without losing your configuration. Always back up any direct code edits you've made before updating, since those will be overwritten.
Troubleshooting / FAQ
Q: My homepage hero section looks empty or has no background. A: Check that Background image is toggled on under Design & branding → Theme, and that a publication cover is set on the Brand tab — the hero pulls its background directly from that cover image.
Q: I changed the Header style but nothing happened on the homepage. A: Header style only affects the homepage, not individual posts or pages. Also confirm you clicked Save in the Design panel — changes aren't applied until saved.
Q: Related posts aren't showing at the end of my post. A: Confirm Show related posts is toggled on under Theme → Post settings, and that the post has at least one tag in common with other published posts — related posts are matched by shared tags.
Q: The announcement bar isn't visible to some of my readers. A: Check the Visibility checkboxes under Announcement settings — if "Public visitors" or "Free members" is unchecked, that group won't see the bar.
Q: My post feed looks different than expected after switching styles. A: Post feed style (List vs. Grid) works together with the Show images in feed, Show author, and Show publish date toggles — review all of them together, since disabling one can make the layout look incomplete.
Credits and Support
- Theme: Edge, by People Themes
- License: MIT
- Support: support@peoplethemes.com
Theme Settings
All visual settings for Edge live under Settings → Design & branding → Theme. Changes are previewed live before you save. The sections below cover each setting in detail.
Navigation Layout
The Navigation Layout setting lets you change the position of your website logo and navigation menu. Choose the layout that best matches your branding and website style.
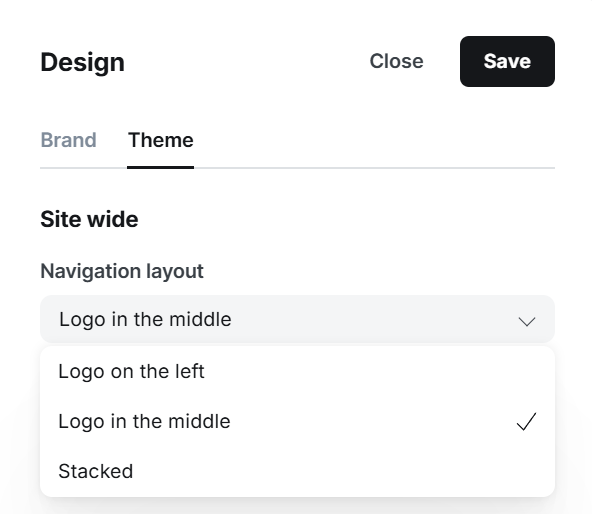
You can access this feature from:
Ghost Admin → Settings → Design & Branding → Theme
Available Layouts
- Logo on the Left – Displays the logo on the left and the navigation menu beside it.
- Logo in the Middle – Centers the logo with navigation items on both sides.
- Stacked – Places the logo above the navigation menu for a clean, vertical layout.
Steps
- Go to Ghost Admin → Settings → Design & Branding → Theme.
- Find the Navigation Layout option.
- Select your preferred layout.
- Click Save.
- Refresh your website to view the updated navigation layout.
Related Posts
The Related Posts feature displays recommended articles at the end of each post, helping readers discover more content and stay engaged on your website.
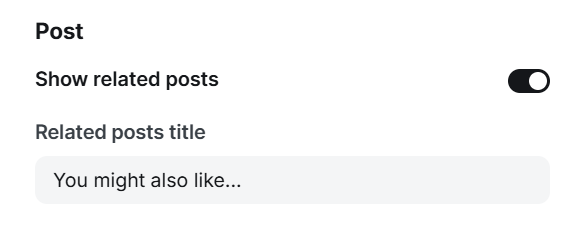
You can access this feature from:
Ghost Admin → Settings → Design & Branding → Theme
Settings
- Show Related Posts – Enable or disable the related posts section.
- Related Posts Title – Customize the heading displayed above the recommended posts (e.g., You might also like...).
Steps
- Go to Ghost Admin → Settings → Design & Branding → Theme.
- Enable or disable Show Related Posts.
- Enter a custom title in the Related Posts Title field.
- Click Save.
- Open any post to view the changes.
Navigation
The Navigation settings let you create and organize your website menus. You can add links to pages, categories, external websites, or any custom URL, and rearrange items by dragging them into your preferred order.

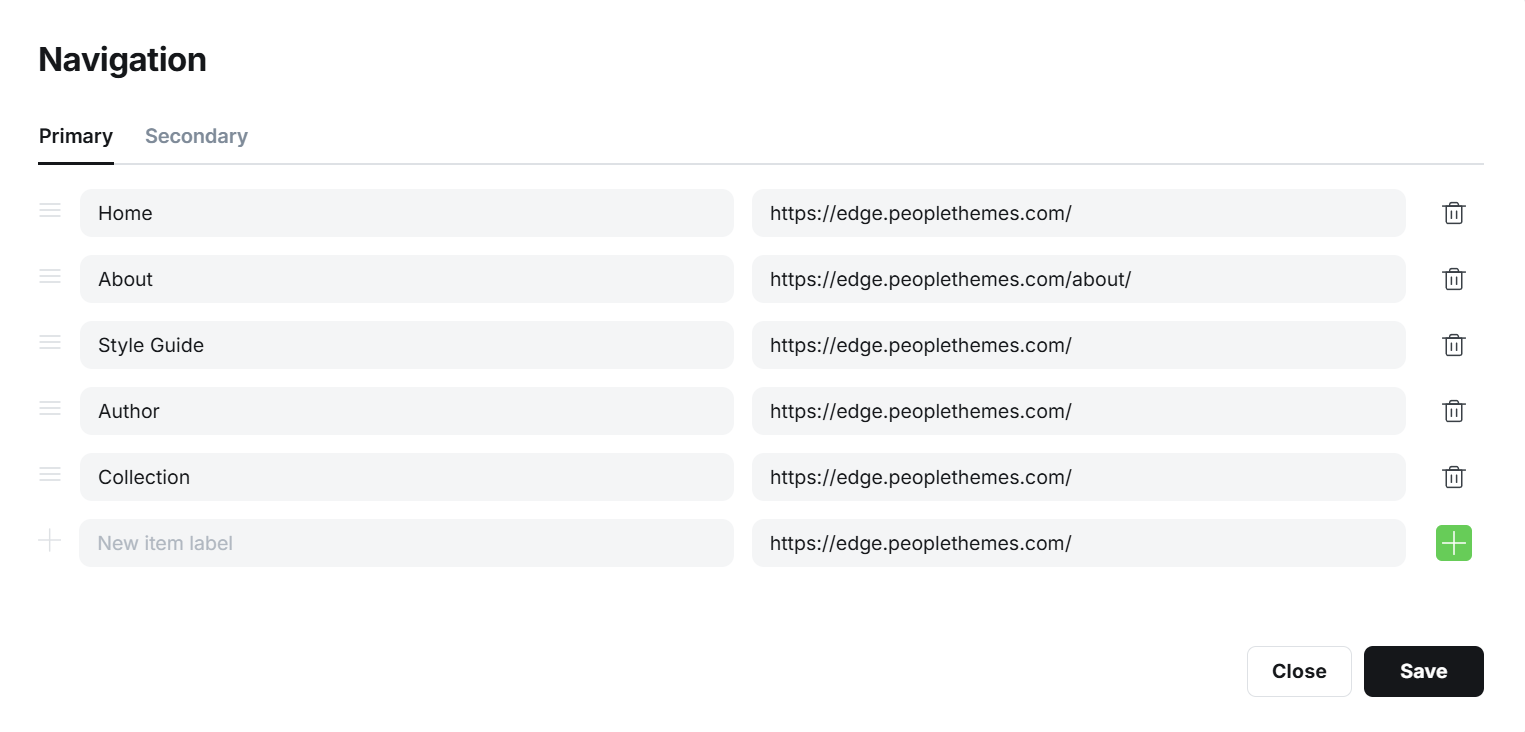
Features
- Label – The text shown in the navigation menu.
- URL – The destination link for the menu item.
- Drag Handle – Drag to change the menu order.
- + Button – Add a new menu item.
- Trash Icon – Delete a menu item.
Steps
- Go to Ghost Admin → Settings → Navigation.
- Open the Primary tab.
- Enter a Label (menu name).
- Enter the corresponding URL.
- Click + to add more menu items.
- Drag items to reorder them.
- Click Save.
Social Accounts
Ghost currently supports X (Twitter) and Facebook in the Social Accounts settings.
To connect your accounts:
- Go to Ghost Admin → Settings → Social Accounts.
- Paste your full X profile URL into the X field.
- Paste your full Facebook Page/Profile URL into the Facebook field.
- Click Save.
Examples:
- X:
https://x.com/yourusername - Facebook:
https://facebook.com/yourpage
Note: Ghost only supports X and Facebook in this section. To display additional social media icons (Instagram, LinkedIn, Threads, Mastodon, TikTok, YouTube, etc.), use the Code Injection feature included with this theme.
Adding Additional Social Media
Ghost only supports X and Facebook in the Social Accounts settings. This theme includes a Code Injection feature that lets you add more social media links, such as Instagram, LinkedIn, Threads, Mastodon, TikTok, and YouTube.
You can access this feature from:
Ghost Admin → Settings → Code Injection → Site Footer
Replace the placeholder URLs with your own profile links.

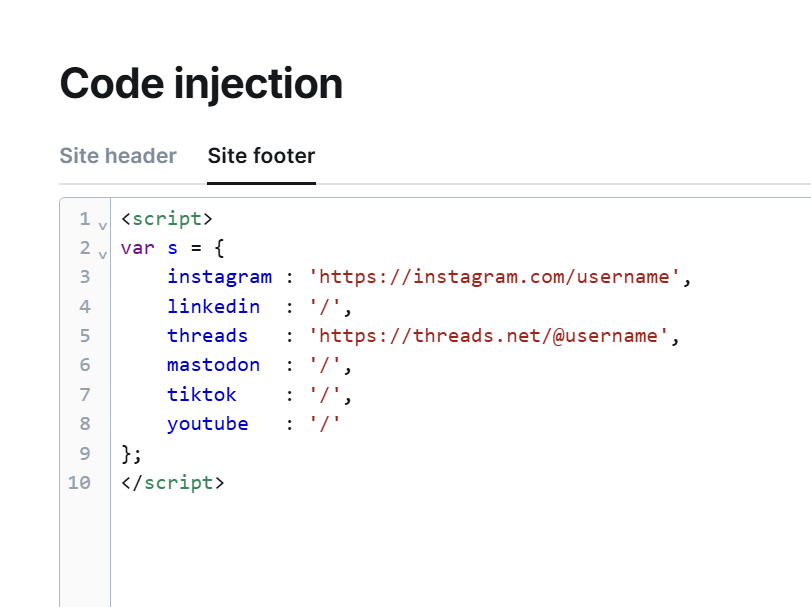
<script>
var s = {
    instagram : 'https://instagram.com/yourusername',
    linkedin  : 'https://linkedin.com/in/yourusername',
    threads   : 'https://threads.net/@yourusername',
    mastodon  : 'https://mastodon.social/@yourusername',
    tiktok    : 'https://tiktok.com/@yourusername',
    youtube   : 'https://youtube.com/@yourchannel'
};
</script>
Optional Page
Pages
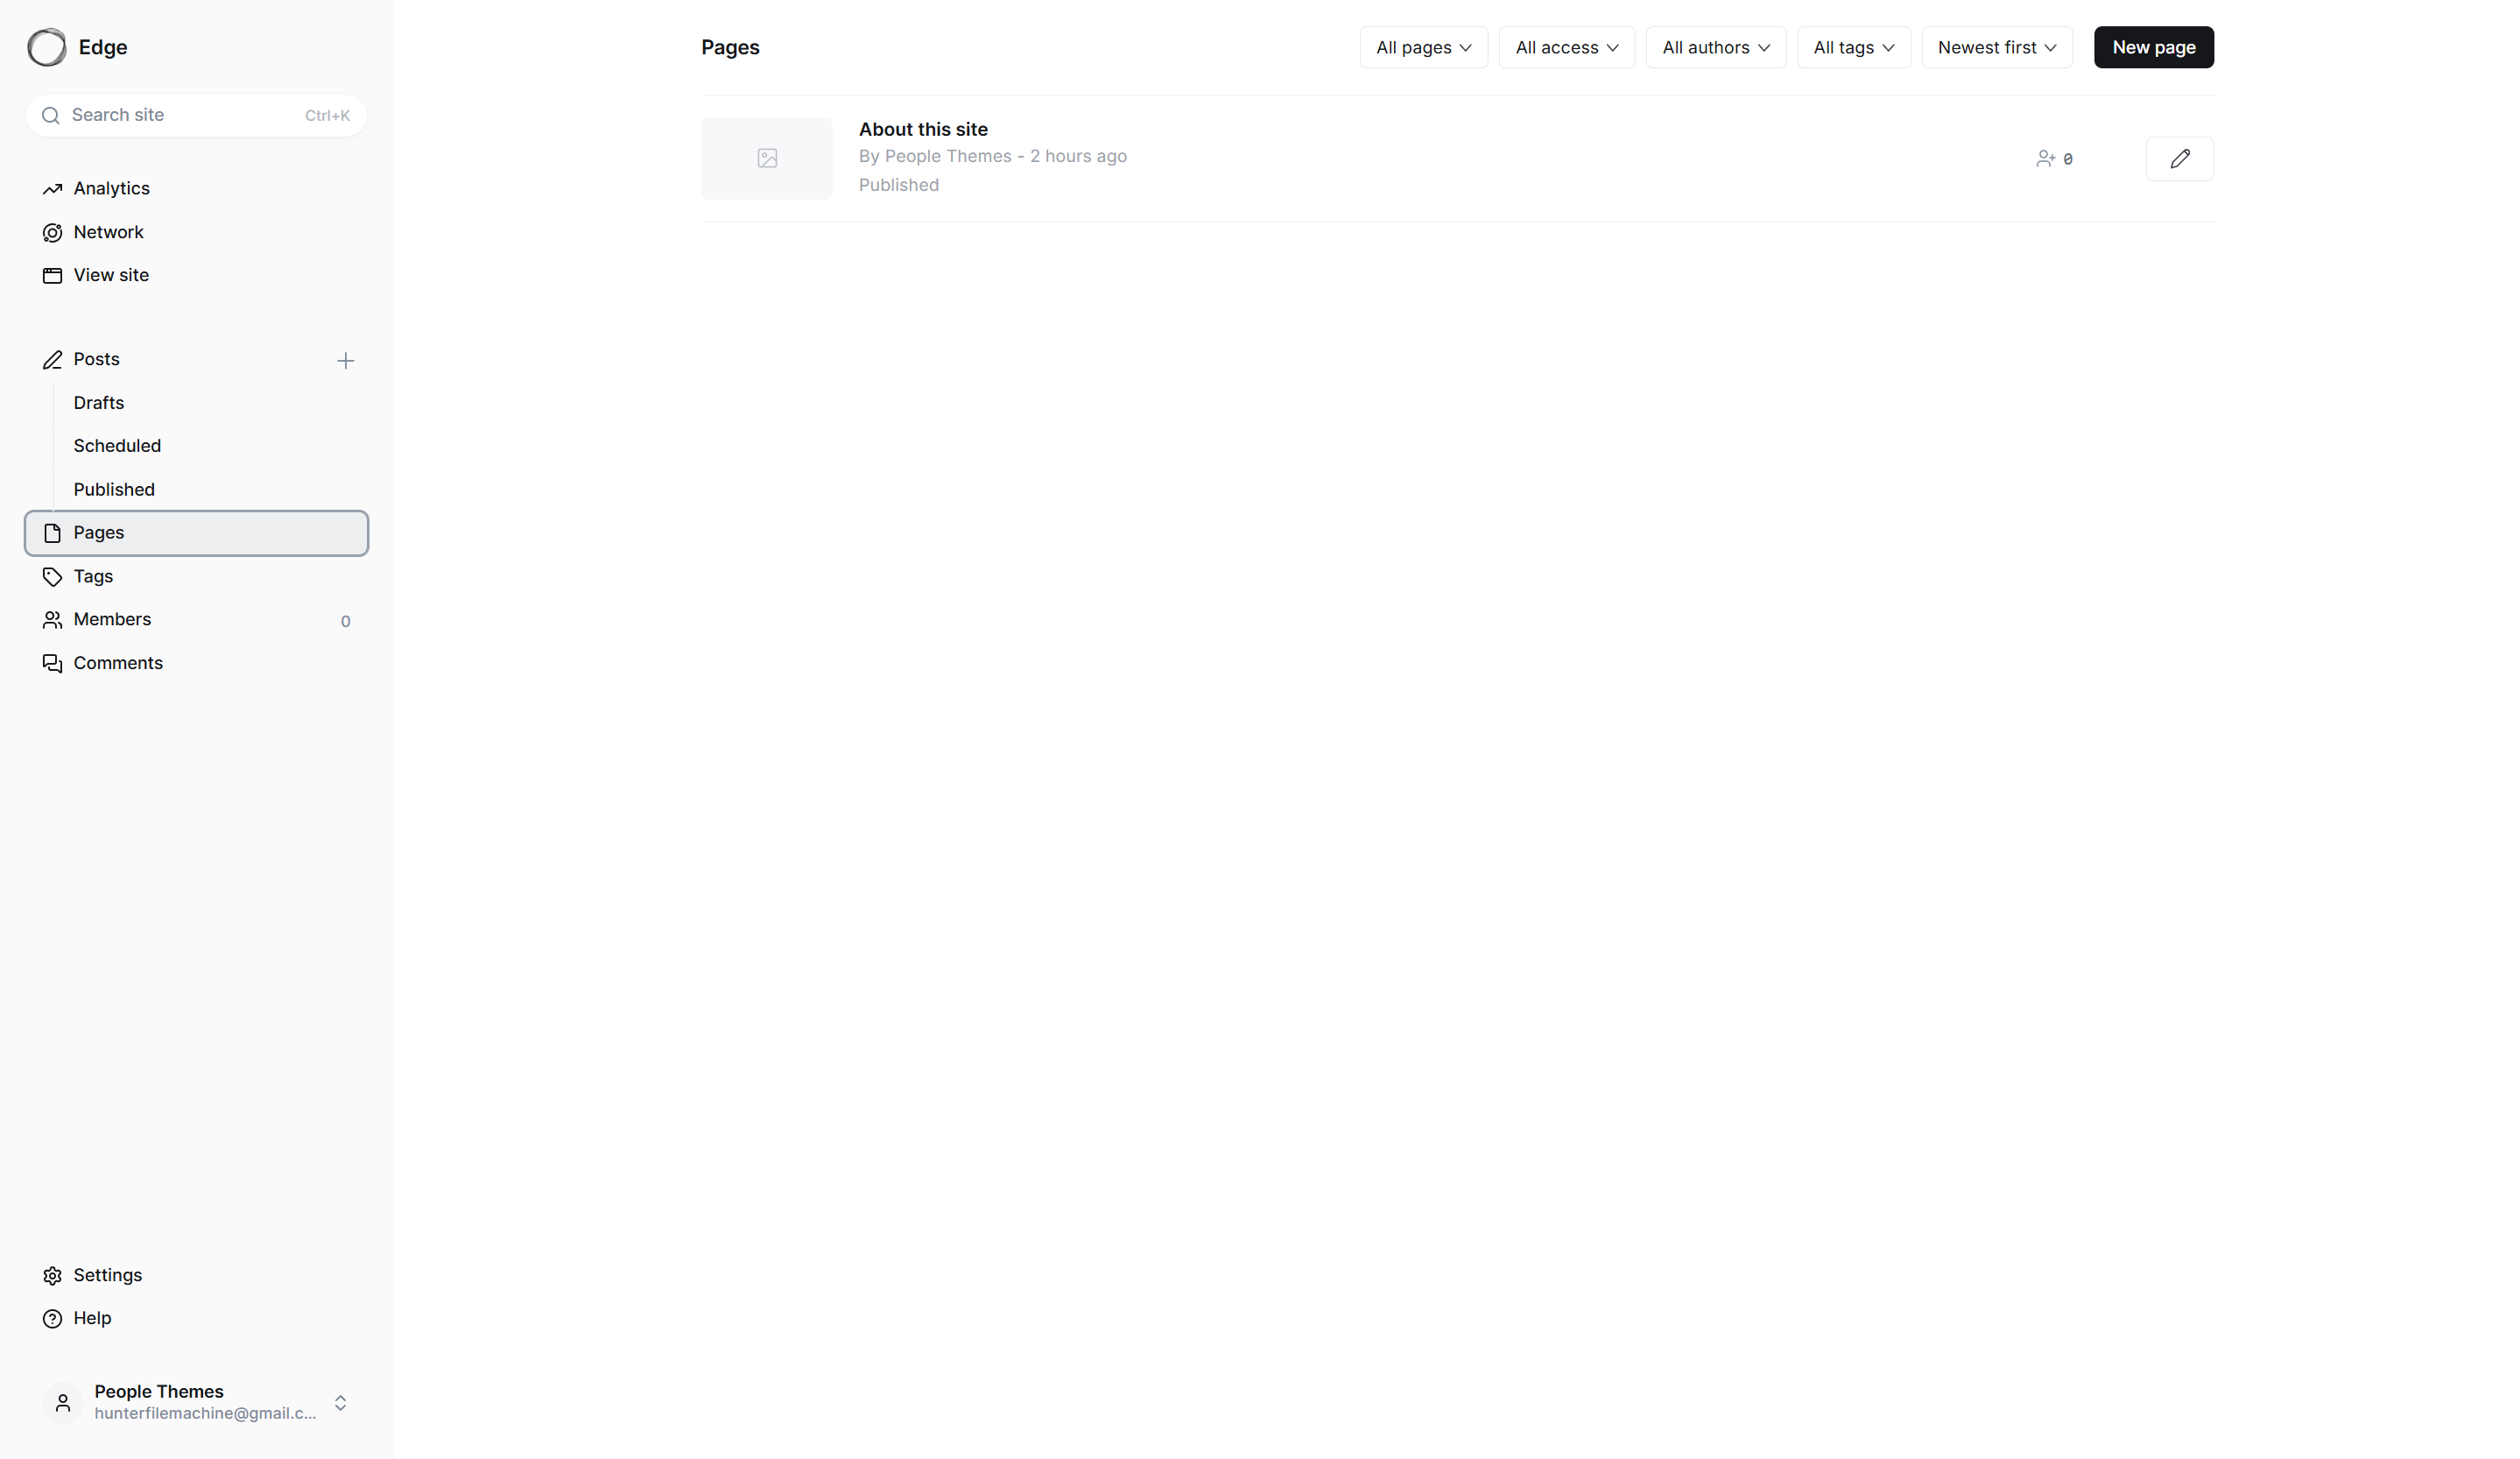
The Pages feature lets you create standalone pages that are separate from your blog posts. Use pages for static content such as About, Contact, Privacy Policy, Documentation, or FAQ.
Features
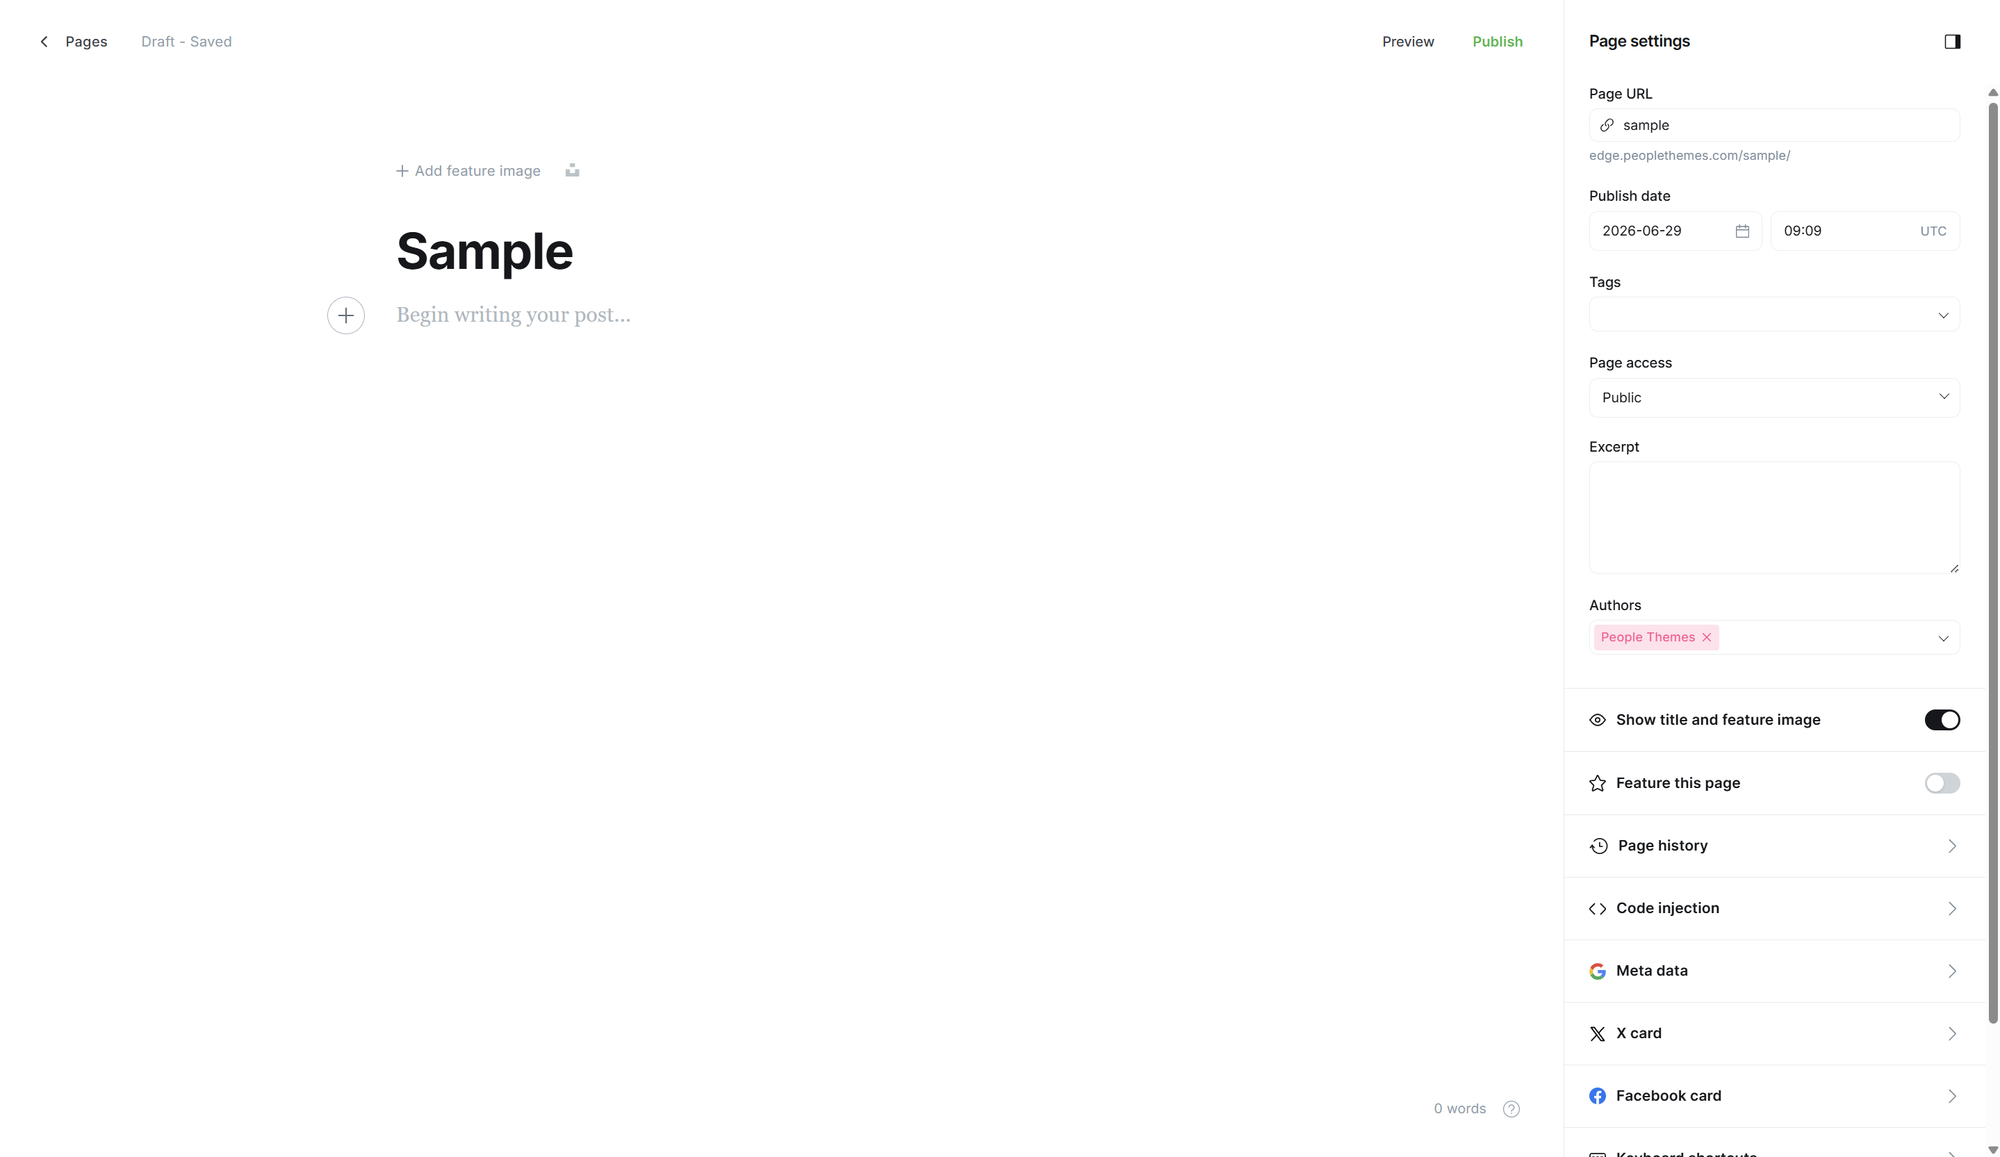
- Page Title – The page name shown to visitors.
- Content Editor – Add text, images, galleries, buttons, embeds, and other content.
- Feature Image – Display a cover image for the page.
- Page URL – Customize the page link.
- Tags – Organize pages with tags.
- Page Access – Control who can view the page.
- Excerpt – Add a short page summary for SEO and previews.
- Authors – Assign one or more authors.
- Template – Select a custom page template (if supported by the theme).
- Feature this Page – Highlight the page in supported theme sections.
- Code Injection – Add custom CSS or JavaScript for this page only.
- Meta Data – Customize SEO title and description.
- X Card & Facebook Card – Customize how the page appears when shared on social media.
Steps
- Go to Ghost Admin → Pages.
- Click New page.
- Enter a Page Title.
- Add your page content using the editor.
- Configure the Page Settings on the right sidebar if needed.
- Click Publish to make the page live.
Updates
Remove label "Powered by Ghost"
Previously, the "Powered by Ghost" label was displayed in the site footer. After this update, the label has been removed for a cleaner, more professional look.
People Themes
About
We're a small studio focused entirely on Ghost — designing themes that are clean, fast, and built to last. From layout to typography, every detail is considered so you can focus on your content. We believe good design should feel unique, without compromising function."
Support
Stuck on something, or just have a question about this theme? Drop us a message — we usually reply within 24 hours.
People Themes — Uncommon Ghost themes.